
Introducing BleuIO
I recently started working on a new project that involves BLE (Bluetooth Low Energy). I quickly realized I need a fast way of validating/testing connectivity between two BLE devices. Specifically, my application required a BLE connection between my PC and a test device: and like any modern 21st century human, I googled it. Luckily I stumbled upon a solution that was definitely worth sharing, hence this blog.
Introducing the BleuIO dongle from Smart Sensor Devices AB, a company based in Sweden specializing in smart sensors and devices.
This is a pretty handy solution that could really help you speed up your BLE application development: suffice it to say that it was definitely made for developers. There is a nice library of scripts, tutorials and utilities to really help you hit the ground running.
The test setup
Here is the setup used for this test:
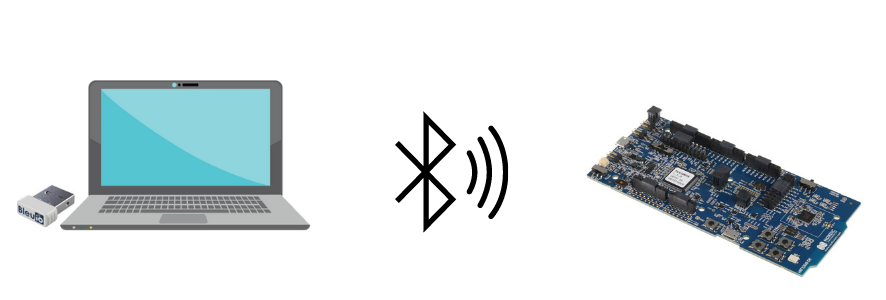
To test connectivity with this setup, you need to:
- Upload example code from the NRF5SDK
- Use a terminal application, such as Putty, to send AT commands to the dongle
In this specific setup, it is critical to understand the GAP (Generic Access Profile) roles of the two devices:
- The Dongle acts as a central: it is responsible for initiating the connection
- The NRF52840 DK acts as a peripheral: it has data to expose and lets the world know it’s there by advertising itself
Setup dongle
To setup the dongle, simply plug it in one of the available USB ports on your PC. Within a few seconds, it’s automatically installed and you can access it via a serial/COM port.
Open a terminal application like Putty or Tera Term and connect to the serial/COM port with these settings:
- Speed (Baud rate): 57600
- Serial Port: 8N1 (8 data bits, No stop bits, No Parity, No Flow Control, 1 Stop Bit)
With the serial port open, send an AT command to verify the dongle works. You should see OK.
The dongle needs to be configured as a Central device (it is a Peripheral by default):
- Enter the
ATIcommand to see its current config - Enter the
AT+CENTRALcommand to configure the dongle as a Central device - Verify status with
ATIcommand
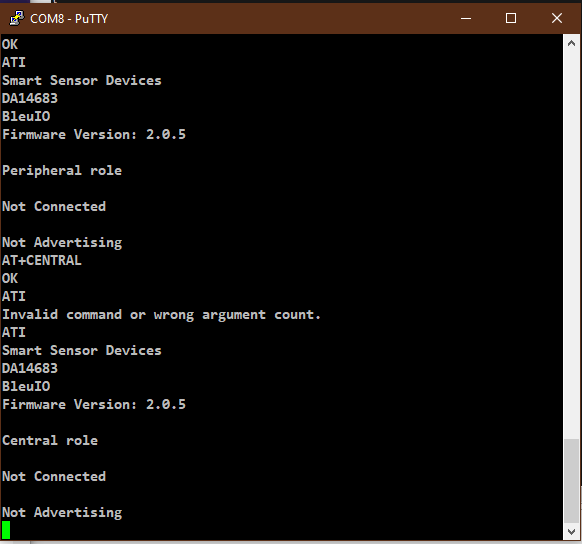
Refer to the AT commands reference guide.
Setup test code
For our test, we’ll be using the Nordic NRF5 SDK. We’ll use a slightly modified version of the BLE App Heart Rate Sensor Peripheral example.
You need to download and install Segger Embedded Studio to try out the project. Check out the example code repo on my GitHub.
To run the example project:
- Go to download location > bleuio_dongle_test > ses
- Open bleuio_dongle_ble_test.emProject using Segger Embedded Studio
- Start a debug session (this automatically compiles the code). On the menu bar go to Debug > Go
- The NRF52840-DK should now be flashed with the example code
- LED 1 on the DK will flash: this indicates it is advertising
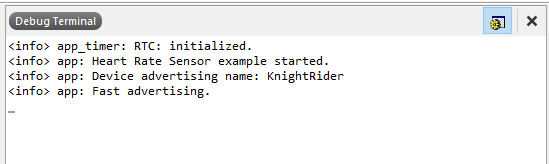
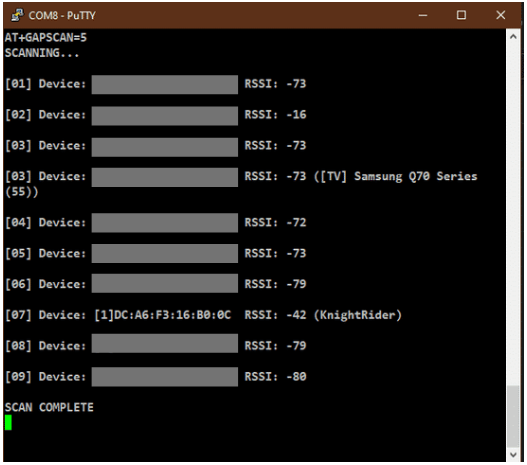
The device is advertising itself using the name KnightRider. We’ll be using this name shortly.
Basic BLE functionality test
We will cover 2 very basic areas: advertising and connecting.
Advertising
From the Putty Terminal, send the command AT+GAPSCAN=X (where X is the scan duration in seconds). This returns a list of detected Bluetooth/BLE devices. KnightRider should appear in the list.
Connecting
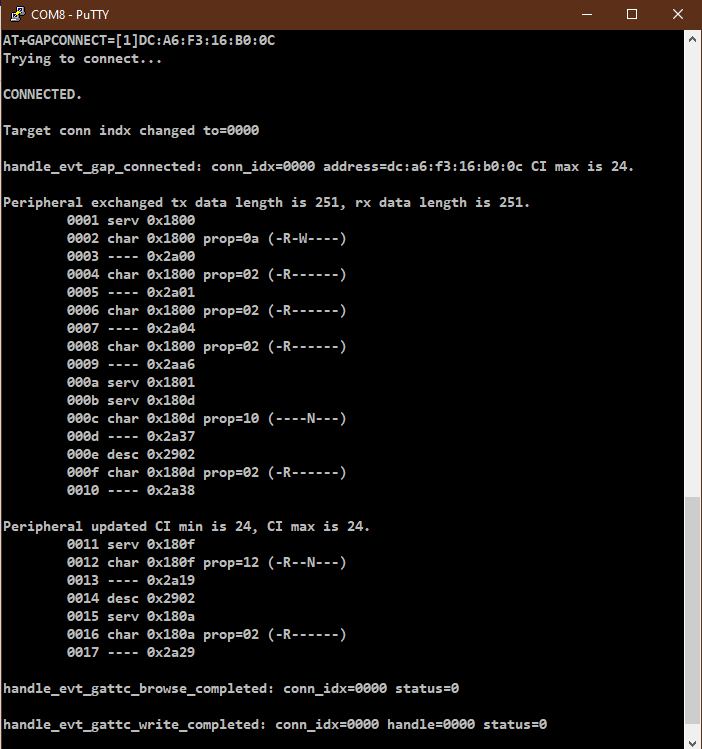
To connect to KnightRider, enter the command AT+GAPCONNECT followed by the address type and device address. See the AT command reference guide for details.
Conclusion
We’ve looked at how we can use the BleuIO dongle for doing basic BLE connectivity tests. It proves to be a very handy tool for developing BLE projects. With Python and Javascript libraries available at your disposal, there’s no limit to what you can do with this dongle.